Instagram users can already access it from a computer or even iPad through the desktop website, but there’s no option to upload photos, videos, or even stories. However, this is expected to change soon, as the company is now working on an update to its website that will allow users to create posts from there.
As revealed by developer and app analyst Alessandro Paluzzi, the update brings the post creator to the web version of Instagram — which was previously only available on the mobile Instagram website besides the official app.
Paluzzi managed to enable the new option on his profile through undisclosed methods, and he shared some images on Twitter of how Instagram’s post creator will work on the web. The interface has been tweaked with a preview of the content next to the publishing options. Users will also find options to crop the image, apply filters (the same as in the app), and set a description.
While the developer did not mention when this new feature will be available to everyone, this is great news for iPad users. While you can install the Instagram app on the iPad, it just runs as an iPhone app without taking advantage of the entire screen.
Unfortunately, Instagram CEO said last year that an iPad version of the app is not in the company’s plans, but being able to create posts from the desktop website makes things less bad, at least. Posting Stories through the web version, however, should take a bit longer to become a reality.
App developer Jeremy Provost discovered that Apple has given Zoom access to a private iPad camera API. With that, the meeting app is the only one, except by Apple’s FaceTime, being able to use the camera during iPad Split View multitasking.
With this feature only available on the Zoom app, it gives an advantage to the app among the others, since the user can use the Split View multitasking to access Twitter, a notes app, etc.
As Provost explains in his blog post, when he first discovered Zoom could take advantage of the Split View feature, he started to search for the process for other developers being able to do the same.
“We asked Zoom and to our surprise, they gave us the answer, and in the process revealed an apparently private process, available only to those deemed worthy by Apple.“
To receive access to some API, Apple must give an “entitlement,” which is a right or privilege that grants an executable particular capabilities. Apple explains:
“For example, an app needs the HomeKit Entitlement — along with explicit user consent — to access a user’s home automation network. An app stores its entitlements as key-value pairs embedded in the code signature of its binary executable.“
While Apple provides public documentation and a process for requesting access to entitlements, for example, Provost discovered that there isn’t a public process for requesting this specific API.
As we’ve been informed, it is called com.apple.developer.avfoundation.multitasking-camera-access. Unfortunately, unlike with CarPlay there is no public process for requesting this entitlement. In fact, its existence is not even documented by Apple publicly. Go ahead and Google it, you’ll only turn up the Zoom Developer Forum.
While it’s still unknown why Apple only gave this particular feature for the Zoom app — as the company says, it treats every developer the same, on Thursday, App Store VP testified in Epic trial as emails revealed special API access for Hulu and other devs:
“One email shows there was an internal question about why Hulu was able to switch between App Store billing and Hulu billing. As it turns out, Hulu is part of a “set of whitelisted developers” with access to the subscription cancel/refund API. The company had initially given Hulu access to this API to support upgrade and downgrade plan changes before this was natively built-in to the App Store.“
On the other hand, in the ‘Spring Loaded’ event in April, Apple announced a feature called Center Stage, exclusively available on the M1 iPad Pro, and will let all videoconference apps be able to take advantage of it if their developers choose to.
With the Center Stage feature, the Ultra-Wide front camera will be able to track the user in a conference and position him in the center of the frame. As for now, if you use an iPad in landscape mode, you’ll probably not look good in front of the camera.
iPad Camera Multitasking
A few months back I was surprised to see that Zoom had somehow been able to tap into using the camera during iPad Split View multitasking. This is an obvious feature for a videoconferencing app so that you can keep one eye on your meeting while you consult notes, look at a presentation, or slack off on Twitter.
I scoured the web and found no reference to how to enable this feature for our own iOS Zoom client, Participant for Zoom. We asked Zoom and to our surprise they gave us the answer, and in the process revealed an apparently private process, available only to those deemed worthy by Apple.
This capability is enabled by means of an entitlement. You can read more about entitlements here. In order to access certain OS features, app developers enable public entitlements, like iCloud access or push notifications. But for quite some time there have also existed private entitlements. One example is the ability for an app to integrate with CarPlay.
Apple provides public documentation and a process for requesting CarPlay access that any developer can apply for. Of course, Apple wisely restricts what types of apps can integrate with CarPlay. You need to fall into one of the following categories:
Audio
Automaker
Communication
EV Charging
Navigation
Parking
Quick Food Ordering
Once Apple has granted you the entitlement it will appear in your developer account for you to add to a particular app.
So then, what is the entitlement for iPad Camera Multitasking? As we’ve been informed, it is called com.apple.developer.avfoundation.multitasking-camera-access. Unfortunately, unlike with CarPlay there is no public process for requesting this entitlement. In fact, its existence is not even documented by Apple publicly. Go ahead and Google it, you’ll only turn up the Zoom Developer Forum.
It’s understandable that this entitlement may not be appropriate for every app, or perhaps there may be ways for it to be abused. Maybe it makes sense for there to be an approval process, like with CarPlay. But it doesn’t make sense for this to be private, undocumented, and only accessible to Apple’s preferred partners. You can’t say “we treat every developer the same” while privately giving special capabilities to certain developers.
We’ve gone ahead and reached out to Apple through their developer contact page and made a request for “iPad Camera Multitasking”. We’ll see where this goes.
Apple today introduced the all-new iPad Air — the most powerful, versatile, and colorful iPad Air ever.
The most powerful iPad Air ever features new all-screen design with larger 10.9-inch display, new 12MP rear camera, next-generation Touch ID sensor, and more
Apple introduced an all-new iPad Air — the most powerful, versatile, and colorful iPad Air ever. Now available in five gorgeous finishes, iPad Air features an all-screen design with a larger 10.9-inch Liquid Retina display, camera and audio upgrades, a new integrated Touch ID sensor in the top button, and the powerful A14 Bionic for a massive boost in performance, making this by far the most powerful and capable iPad Air ever made. The new iPad Air will be available starting next month.
“Today we’re excited to introduce a completely redesigned and far more powerful iPad Air, debuting Apple’s most powerful chip ever made, the A14 Bionic,” said Greg Joswiak, Apple’s senior vice president of Worldwide Marketing. “With its gorgeous new all-screen design, larger 10.9-inch Liquid Retina display, next-generation Touch ID, and a massive boost in performance with A14 Bionic, the new iPad Air brings customers powerful pro features at an even more affordable price. Along with major upgrades to the iPad Pro and eighth-generation iPad this year, and the powerful new features of iPadOS 14, this is our strongest iPad lineup ever, giving our customers even more ways to enrich their daily lives.”
iPad Air features an all-screen design with a larger 10.9-inch Liquid Retina display, a new Touch ID sensor integrated into the top button, camera and audio upgrades, and debuts the powerful A14 Bionic, Apple’s most powerful chip ever.
All-New iPad Air Design in Five Beautiful Finishes
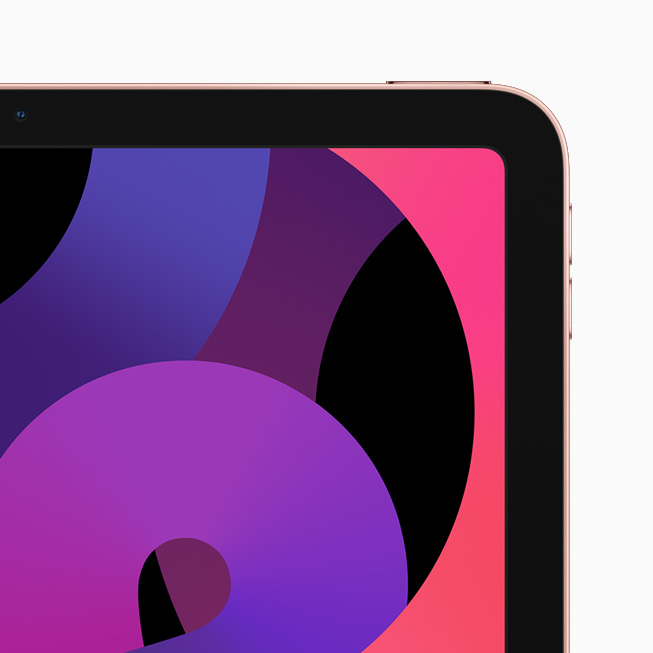
The new iPad Air features a completely new thin and light design in five gorgeous finishes: silver, space gray, rose gold, green, and sky blue. The new all-screen design features a larger 10.9-inch Liquid Retina display for a stunning visual experience, with 3.8 million pixels and advanced technologies, including full lamination, P3 wide color support, True Tone, and an anti-reflective coating for an amazing visual experience. To allow the display to extend on all sides, a next-generation Touch ID sensor is integrated into the top button, providing the same fast, easy, and secure way to unlock iPad Air, log in to apps, or use Apple Pay that customers know and love. iPad Air is compatible with Magic Keyboard and its floating design, and built-in trackpad, Smart Keyboard Folio, and new Smart Folio covers, as well as Apple Pencil, which attaches magnetically to the side for easy pairing, charging, and storing.
The new iPad Air features a completely new thin and light design in five gorgeous finishes: silver, space gray, rose gold, green, and sky blue.
Most Powerful iPad Air with A14 Bionic
iPad Air delivers a massive boost in performance with Apple’s most advanced chip, A14 Bionic. Handling even the most demanding apps, A14 Bionic makes it even easier for users to edit 4K videos, create gorgeous works of art, play immersive games, and more. Using breakthrough 5-nanometer process technology, A14 Bionic is packed with 11.8 billion transistors for increased performance and power efficiency in nearly every part of the chip. This latest-generation A-series chip features a new 6-core design for a 40 percent boost in CPU performance, and a new 4-core graphics architecture for a 30 percent improvement in graphics.2 To deliver breakthrough machine learning capabilities, A14 Bionic includes a new 16-core Neural Engine that is twice as fast, and capable of performing up to 11 trillion operations per second, taking machine learning apps to a whole new level. A14 Bionic also includes second-generation machine learning accelerators in the CPU for 10 times faster machine learning calculations. This combination of the new Neural Engine, CPU machine learning accelerators, and high-performance GPU enables powerful on-device experiences for image recognition, natural language learning, analyzing motion, and more.
A14 Bionic includes a new 16-core Neural Engine that’s capable of performing up to 11 trillion operations per second, taking machine learning apps like djay Pro AI to a whole new level.
Upgraded Camera and Immersive Audio
iPad Air, which includes a 7MP front-facing FaceTime HD camera, now features the same 12MP rear camera used in iPad Pro for higher resolution photos and 4K video capture. The new design of iPad Air features stereo speakers in landscape mode, elevating the audio experience so users can enjoy wider stereo sound while watching video.
iPad Air now features a USB-C port for up to 5Gbps data transfer, which is 10 times faster,2 for connecting to cameras, hard drives, and external monitors up to 4K. With Wi-Fi 6 performance and 60 percent faster LTE connectivity,3 along with A14 Bionic, this is by far the most powerful iPad Air ever.
The new design of iPad Air features stereo speakers in landscape mode so users can enjoy wider stereo sound while watching video.
Distinct iPad Experience with iPadOS 14
iPadOS 14, available beginning Wednesday, September 16, brings new features and designs that take advantage of the unique capabilities of iPad, such as its large Multi-Touch display, and versatile accessories. iPadOS 14 further integrates Apple Pencil into the iPad experience for better note-taking capabilities, and new ways to work with handwritten notes. When taking notes on iPad, Smart Selection uses on-device machine learning to distinguish handwriting from drawings, so handwritten text can easily be selected, cut, and pasted into another document as typed text using the same familiar gestures. Shape recognition allows users to draw shapes that are made geometrically perfect and snap right into place when adding diagrams and illustrations in Notes. Data detectors work seamlessly with handwritten text, recognizing phone numbers, dates, addresses, and links, making it easy for users to perform actions like tapping a handwritten number to make a call.
iPadOS 14 also brings Scribble to iPad, allowing Apple Pencil users to handwrite directly in any text field, making actions like replying to a quick iMessage or searching in Safari fast and easy — all without ever needing to put Apple Pencil away. Scribble uses on-device machine learning to convert handwriting into typed text in real time, so writing is always kept private and secure.
iPadOS 14 makes the iPad experience even more distinctive and powerful in other ways, including:
New compact designs for incoming FaceTime and phone calls, Siri interactions, and Search to help users stay focused on the task at hand.
Universal Search to quickly find practically anything, from locating and launching apps, to accessing contacts, files, and information, to getting answers to common questions about people or places.
New sidebars for many apps including Photos and Files, and streamlined toolbars that consolidate controls into a single place, making them more useful than ever.
Beautifully redesigned widgets that present timely information at a glance right on the Home Screen.
iPadOS 14 brings powerful new features and capabilities, making the iPad experience even more distinctive and versatile.
Most Environmentally Friendly, Most Advanced iPad Lineup Ever
The new iPad Air is designed to be environmentally friendly and supports Apple’s plan to become carbon neutral by 2030. The iPad Air uses a 100 percent recycled aluminum enclosure and 100 percent recycled tin for the solder on its main logic board. The new speakers in iPad Air also use magnets with 100 percent recycled rare earth elements. iPad Air remains free of harmful substances, is highly energy efficient, and uses wood fiber packaging that is recycled or comes from responsibly managed forests.
The new iPad Air joins the powerful iPad Pro, the eighth-generation iPad, and iPad mini to form the most advanced iPad lineup ever.
iPad Air joins the powerful iPad Pro, the eighth-generation iPad, and iPad mini to form the most advanced iPad lineup ever. With support for Apple Pencil, best-in-class performance, advanced displays, and all-day battery life,4 whether customers prioritize portability, power, or price, there’s an iPad for everyone. Learn more about the iPad family at apple.com/ipad/compare.
Pricing and Availability
The new iPad Air will be available starting next month on apple.com and in the Apple Store app in 30 countries and regions, including the US. Wi-Fi models of iPad Air will be available with a starting price of $599 (US) and Wi-Fi + Cellular models start at $729 (US). The new iPad Air, in 64GB and 256GB configurations, will be available in five beautiful finishes including silver, space gray, rose gold, green, and sky blue.
iPadOS 14, the powerful operating system designed specifically for iPad, ships for free with the new eighth-generation iPad and new iPad Air, and will be available as a free software update tomorrow for all iPad Pro models, iPad Air 2 and later, iPad 5th generation and later, and iPad mini 4 and later.
Apple Pencil (2nd generation), available for purchase separately for $129 (US), is compatible with iPad Air.
Magic Keyboard and the Smart Keyboard Folio for iPad Air are available for purchase separately for $299 (US) and $179 (US), respectively, both with layouts for over 30 languages, including simplified Chinese, French, German, Japanese, and Spanish.
Smart Folios are available for iPad Air for $79 (US) in black, white, and three new seasonal colors including deep navy, cyprus green, and pink citrus.
Education pricing for individuals, including current and newly accepted college students and their parents, as well as faculty, staff, and homeschool teachers of all grade levels, is available for $549 (US) for the new iPad Air. The second-generation Apple Pencil is available for $119 (US), the Smart Keyboard Folio is available for $159 (US), and Magic Keyboard for $279 (US). For more information, visit apple.com/us-hed/shop.
Apple One is the easiest way to get many Apple subscription services at a great value, so customers can choose the one plan that is right for them or their whole family. Customers can sign up for Apple One starting this fall.
For a limited time, customers who purchase a new iPad, iPhone, Apple TV, Mac, or iPod touch can enjoy one year of Apple TV+ for free.5
Customers looking for convenient, contactless service are able to find many of the same shopping and support services from apple.com. Customers can chat with an Apple Specialist and get shopping help, choose monthly financing options, trade in eligible devices, and get Genius support and no-contact delivery. In-store pickup is also available. Customers are encouraged to check apple.com/retail for more information on the health and safety measures in place, and the services available at their local store.
Customers in the US can trade in their eligible device for an Apple Gift Card or credit toward their purchase. If the device isn’t eligible for credit, Apple will recycle it for free.6
When customers buy online from Apple, they can make iPad and Apple Pencil (2nd generation) their own with free engraving.
Customers in the US who buy directly from Apple can choose Apple Card monthly installments to pay for their iPad over 12 months, interest-free, and get 3 percent Daily Cash back all upfront. Customers who choose to pay in full with their Apple Card also get 3 percent Daily Cash back.
Customers can extend their limited warranty with AppleCare+ and get 24/7 priority access to technical support.
Every customer who buys iPad from Apple can enjoy a free Online Personal Session with an Apple Specialist to help them explore and discover all of the amazing things they can do with their new iPad.
In Sydney CBD Repair Centre, we fix all kinds of devices from smartphones (Android or iOS), tablets, smartwatches, to fitness wristbands. We curated to you the most common device repairs that we do in our shop in Sydney.
Repair #5: Back Cover Glass Replacement
The back of the smartphone is oftentimes the most overlooked part of any device. But have you noticed that lately, these components are coming in glass material? In the early days of the smartphone, these are made out of good ol’ plastic. Now, if you drop your smartphone without a case, you’ll break the back cover. Sometimes, you can patch it with a case even if it’s too late but the beauty derived from these exotic glass material cannot be denied.
You also have to replace it if you still want to use wireless charging that only comes with an all glass smartphone.
Repair #4: Battery Replacement
This repair are for those who owned their smartphones for a very long time. Oftentimes, people go into the shop with their well-used smartphone. It’s scratched up and had other repairs done to it. However, the battery is not cutting it anymore. Dying before sunset. That’s not good for a workhorse of a smartphone. You can’t rely on a battery that needs recharging every six hours. Oh, no no no. So customers come into the shop to revitalise their old device with a brand new lithium pack. This works all the time. Imagine an old companion having a renewed strength in life. Another productive year ahead just by installing a brand new power source. If that’s not practical, I don’t know what is.
Repair #3: Charging Port Replacement
Here’s a tricky repair to diagnose but pretty easy to fix, a broken charging port. Believe me, this part of your smartphone can be worn out. How? The pulling out of the charger in an awkward angle or the plugging in of a contaminated charging cord? Yes, it can ruin this part and as a result, you can’t recharge your smartphone. Sounds bad? Certainly. But some people mistakenly take this problem as a battery issue or a dead motherboard. No. You just need to get rid of that faulty charging port out of your device, install a new assembly, and you’re good to go. Do you have problems like this? Maybe you just needed a charging port replacement right now.
Repair #2: Camera Outer Glass Replacement
You probably get the jist of this now. All glass parts of a smartphone are vulnerable to breakage. Yes, even the smallest glass portion – the camera glass. If you have a smartphone with a bump for the camera glass, then it can break when you drop the phone at a certain angle. If you have a smartphone with a huge camera patch at the back, it can break. If you have four cameras, then you better have a thick camera case to protect it from impact. The good news is, this is the easiest part to replace. No need to disassemble the entire phone. Just remove the broken glass, pop in a new one and viola, you have a fixed camera outer glass.
Repair #1: Screen Replacement
Our in-demand screen replacement repair service is the most common fix that we do in the shop. Most clients dropped their smartphone with partial, usable screens. Some dropped it and the screen is total-ed. This is the most prominent component of the smartphone and it’s made out of glass. A huge hunk of glass. Once it’s broken, there’s only two things you can do: live with the cracked screen or replace it to restart a new life with a brand new looking smartphone.
Call us at 8011 4119 if you have these problems, Sydney CBD Repair Centre will fix it for you.
Have you ever accidentally deleted an email within the stock mail app on your iPhone or iPad? Most of us have been there at some point. There’s even a good chance that if you’re reading this, you’re panicked because you couldn’t immediately figure out how to recover an email you either accidentally deleted, or intentionally deleted but now want back.
Well, don’t worry, because this tutorial will help you with that. As most of you may know already, there are plenty of email service providers to choose from today, like Gmail, Yahoo, iCloud, Outlook and more. The default iOS Mail application that comes preinstalled with your iPhone and iPad allows users to connect just about any email account they have regardless of the service they use. The Mail app is good enough where most iPhone and iPad users don’t even bother installing the other email apps of their respective providers from the App Store, and instead stick to Mail app that’s pre-installed on their device’s home screen.
In this article, we provide you with step-by-step instructions on how to recover the emails that you may have unintentionally deleted on iPhone or iPad, as well as provide you with additional tips and tricks to make sure you could avoid a similar situation in the near future. This might be particularly useful for users who find themselves accidentally deleting emails on the iPhone recently.
The stock Mail app, just like any other mail application lets users delete as well as archive their mails. More importantly, the apps are designed in such a way that it’s usually a lot more easier to archive a mail rather than just straight up deleting it. Therefore, we’ve decided to cover steps on how to recover both deleted and archived emails.
How to Recover Deleted Emails on iPhone & iPad
The steps that we’re gonna discuss here are going to be fairly similar regardless of the email service provider you use within the Mail app. However, depending on the service, the deleted emails may or may not be stored under a different folder name. Here, we’ve opted to use Gmail as it’s the most popular email service today with a user-base of nearly 2 billion.
Open the “Mail” app on your iPhone or iPad home screen and tap on “Mailboxes”.
Now, tap on “Trash” (or “Bin”, depending on your region settings). If you’re using any other email service provider like Hotmail, you might not necessarily find Bin, but rather a different name let’s say Trash or Junk. So, make sure you check those two folders as well.
As you might have guessed, your deleted emails are stored here in the Trash folder. Emphasizing this is deleted emails, because they’re totally different from archived emails and those are stored elsewhere. Once you’re in the Trash / Bin folder, tap on “Edit”.
Here, you’ll be able to select all the emails that you’d want to recover. Once you’ve selected them, tap on “Move”.
In the next menu, you’ll be able to choose where you want to move your recovered emails to. If you accidentally deleted the emails from your inbox, just tap on “Inbox”. If not, choose “Drafts” or “Sent” depending on your preference.
That’s all you need to do to get back and restore your lost or deleted emails. Once recovered, you’ll find them exactly where they once used to be.
Note that if you wait too long to attempt to recover a deleted email, they may be gone for good. This time can vary per email provider, so basically if you know you deleted an email and you want it recovered, you should try to restore it sooner than later.
How to Recover Archived Emails on iPhone & iPad
Archiving emails within the Mail app is a whole lot easier than deleting, so we wouldn’t be surprised if you accidentally archived some of your mails while you were trying to swipe through them. These emails are stored in a completely different location though, so make sure you follow these step-by-step instructions.
As you can see in the screenshot below, all it takes is an accidental swipe to the left and the mail would get archived immediately without requiring any further confirmation. To find them, simply tap on “Mailboxes” at the top-left corner of your screen.
If you’re using Gmail like me, tap on “All Mail” as shown in the screenshot below. However, depending on the email service provider that you’re using, you may have a dedicated “Archived” section. Tap on this section if you can see it.
Here, you’ll find all your archived emails mixed along with your other emails, especially if you’re using Gmail. This can be a little confusing with some email providers, but depending on the different email providers it may give you a dedicated Archived mails section where you’ll be able to easily find them. Once you find one of the archived mail that you want to recover, swipe left on it and tap on “More”. Now tap on “Other Mailbox” as displayed in the screenshot below.
In this menu, you’ll be able to choose where you want to recover the archived email to. Let’s say you want to move it back to the inbox. You simply need to tap on “Inbox” and you’ll find it right where it used to belong.
Those are all the steps you needed to follow to recover and restore your archived emails right where it used to be. However, we’re not done with the article yet, as we want to make sure you don’t end up in a similar situation and go through a hassle again, so next up is a quick trick to undo an accidental move in the Mail app on iPhone and iPad.
Instantly Undo & Recover Deleted Emails
The next time you unintentionally swipe and delete/archive an email, you don’t really have to go through all these steps again. Thanks to this nifty iOS gesture that you may or may not have heard of, you’ll be able to instantly recover a deleted mail within a second or two. When you’ve accidentally deleted or archived any mail, simply shake your iPhone or iPad once for an “Undo Delete” option to pop up on screen. Just tap on “Undo” to confirm and recover the deleted email and you’re good to go.
It’s worth noting that you can only use this gesture to recover a deleted mail as long as you haven’t closed the Mail app. So, make sure you aren’t too late or you’ll have to go through all the previously mentioned steps again, which is a hassle you wouldn’t want to deal with. That being said, we hope this tutorial helped you to recover plenty of emails today.
Many Siri interactions and requests submit anonymized audio recordings to Apple servers in order to process, review, and to ascertain for accuracy and quality. For example, if you ask Siri on iPhone for the weather, that request may be recorded as audio and processed on Apple servers. While this data is anonymized from an Apple ID, it is apparently associated with a specific iPhone or iPad.
Some users may wish to delete any stored Siri audio history and dictation history that is associated with their devices, whether for personal, professional, or privacy reasons, and that’s what this article will show you how to do.
How to Delete Siri Audio History from Apple Servers for iPhone & iPad
Because this feature is device specific, you may want to repeat the same removal process with other iPhone and iPad hardware that you have used Siri with. Here’s how the Siri data removal process works :
Open the “Settings” app on iPhone or iPad
Go to “Siri & Search”
Choose “Siri & Dictation History”
Choose “Delete Siri & Dictation History”
Confirm that you want to remove all Siri and Dictation data associated with that device from Apple servers by choosing “Delete Siri & Dictation History”
You’ll then get an alert stating that the request was received and that your Siri and Dictation history data will be removed from Apple servers.
Note that deleting Siri Audio History has absolutely no impact on the ability of Siri commands and tricks to work, it only removes any recordings that are made from Siri and that particular device.
Remember you can also disable Siri completely on iPhone and iPad, and turn it off on Mac too, if you find yourself either never using the feature, or for any other reason.
The ability to delete Siri audio recordings is available in iOS 13.2 or later and iPadOS 13.2 or later, earlier versions of system software do not contain this ability.
This data removal and privacy feature may be in response to a Guardian story, which claimed:
“Apple contractors regularly hear confidential medical information, drug deals, and recordings of couples having sex, as part of their job providing quality control, or “grading”, the company’s Siri voice assistant, the Guardian has learned.”
In response to that Guardian article, Apple told the Guardian:
“A small portion of Siri requests are analysed to improve Siri and dictation. User requests are not associated with the user’s Apple ID. Siri responses are analysed in secure facilities and all reviewers are under the obligation to adhere to Apple’s strict confidentiality requirements.”
Since Apple promotes data privacy as a feature, the company introducing a new feature to allow users to delete any of these Siri audio recordings from Apple servers makes sense as it gives users more control over their personal data.
Another separate and new feature in the latest iOS and iPadOS versions allows you to opt out of Siri audio recordings storage and review in general. That setting can be accessed through Settings > Privacy > Analytics & Improvements > turn off “Improve Siri & Dictation”
You can easily add filters to your videos captured on iPhone or iPad, a new ability that has been introduced in the latest versions of iOS and iPadOS.
We’ve been able to apply filters to photos via the Photos app for years, but being able to do the same to video via the Photos app is something new. And it looks and works exactly how you would expect it to.
How to Apply Filters to Video on iPhone and iPad
Let’s get started with understanding how filters can be applied to videos:
Open the Photos app and make sure the video you want to apply a filter to is selected and active on the screen
Tap the “Edit” button.
Tap the Filters icon. It looks a little like a Venn diagram but it’s also pointed out in our screenshot, too.
There are nine different filters to choose from – Vivid, Vivid Warm, Vivid Cool, Dramatic, Dramatic Warm, Dramatic Cool, Mono, Silvertone, and Noir. Swipe through them to select the one you want. You’ll also see the filter previewed.
A new slider will appear – below the filters on iPhone, beside on iPad. Slide it to change how dramatic the applied filter will be. Again, this is previewed so you can make the selection that’s right for the content you’re editing.
Tap “Done” when you have everything set as you’d like it.
The edits are then made and the video saved. That might take a while depending on the length of the video and the iPhone or iPad you’re using. You can leave the Photos app to do its thing, though. No need to watch it render.
Any changers you make will also be synced via iCloud if you’re using iCloud Photo Library. They’ll be pushed to all of your other devices, too.
The ability to apply filters to videos is new to iOS 13 and iPadOS 13.1 and later, previous versions of the Photos app did not have this capability. Accordingly, if you don’t have the filter options for videos, it’s likely that you’re not running a newer iOS or ipadOS release.
The improved Photos app is great for applying filters and making simple changes but if you want to make more advanced edits, like cropping videos, then iMovie is what you’re looking for. You can download the iMovie app free from the App Store if it isn’t already on your device, too.
Wondering how to stop Spotify from playing music videos automatically? You’re probably not alone. Fortunately it’s easy to turn the visual loop and music video feature off with Spotify on iPhone, iPad, and Android.
The latest versions of Spotify on iPhone, iPad, and Android default to automatically playing short clips of music videos with many songs. Those music video clips play in a constant loop while the song is playing too. But if you don’t want Spotify to automatically play music videos of many songs, you can turn this feature off. Here’s how to do it.
How to Stop Spotify Playing Music Video Loops on Songs
Open the Spotify app on iPhone, iPad, or Android if you have not done so already
Go to “Your Library”
Choose the Gear icon to access Settings in the corner
Choose “Playback” from Settings
Scroll down and locate the “Canvas” setting, turn that to the OFF position to disable playing the music video loops on songs
With this setting turned off, the Spotify app will show just the album art of any playing song or music, rather than a clip of a music video or other looping visual.
Now you can enjoy listening to your music on Spotify without any videos playing to the music. This may desirable for many reasons, whether you find the videos to be annoying or distracting, or if you mostly use Spotify to stream from iPhone to Sonos or some other speaker and never seen the screen anyway, or just out of personal preference.
This will turn off Spotify video playing on all songs whether it’s a full album, a single downloaded song from Spotify, or anything streamed.
You can also turn off the “Behind the Lyrics” feature of Spotify if interested while you’re in the Spotify Settings.
Of course you can re-enable the auto playing music videos and music visuals in Spotify if you want to at any time. Just go back to Spotify Settings > Playback > and turn the Canvas feature back on again.
Wondering which Mac and iPad models support Sidecar? If you’re curious as to whether or not a Mac and iPad is compatible with Sidecar, you’ll find the list of supported devices below to be helpful. Not all Mac and iPad models support the feature, but most new models do.
Sidecar is the helpful new feature introduced in MacOS Catalina 10.15 and iPadOS 13 that allows an iPad to function as an external display for a Mac, with full touch screen support on the iPad as well as the ability you use Apple Pencil. Some MacOS Catalina users have attempted to use Sidecar but found it’s not working on their Mac and iPad combination, perhaps thinking it’s a problem with MacOS Catalinawhen in fact it’s just a matter of system compatibility. So let’s review which devices Sidecar works for.
Sidecar System Requirements for Mac & iPad
Sidecar is only compatible with some of the latest models of iPad and Mac hardware.
iPad Models with Sidecar Support
iPad must be running iPadOS 13 or later, and must be one of the following devices:
iPad Pro (all models, including 9.7″ iPad Pro, 10.5″ iPad Pro, 11″ iPad Pro, 12.9″ iPad Pro, all generations)
iPad Air (3rd generation and newer)
iPad (7th generation and newer)
iPad (6th generation and newer)
iPad mini 5 (and newer)
You might notice that only the iPad models with Apple Pencil support will also support Sidecar (and yes, you can use Sidecar without having an Apple Pencil, just use touch interaction instead).
Macs with Sidecar Compatibility
The Mac must be running MacOS Catalina 10.15 or later, and must be one of the following computers:
MacBook Pro (2016) or newer
MacBook Air (2018) or newer
MacBook (Early 2016) or newer
Mac Mini (2018) or newer
Mac Pro (2019)
iMac Pro (2017) or newer
iMac 27″ (Late 2015) or newer
For Mac, you can confirm that Sidecar is enabled and available on the Mac by going to the System Preferences and checking the Sidecar preferences.
Assuming you meet the system requirements for using Sidecar on Mac and iPad, you must have the two devices with Handoff enabled and within range of one another, and the feature should work and be available.
As you can see, there are various other iPad and Mac models that do not support Sidecar, even if they otherwise compatible with MacOS Catalina and compatible with iPadOS 13. So if you have recently updated your devices to the latest operating systems but find the feature is not available or is not working, perhaps it’s because of a compatibility issue with the hardware not being supported, rather than a problem with the Sidecar feature itself.
You might be asking yourself how to delete apps in iOS 13, now that when you long-press on an app icon you see a contextual menu. The functionality for deleting apps and removing them from an iPhone, iPad, or iPod touch remains in iOS 13 and iPadOS 13, but it’s just slightly different enough than it was before to possibly cause people to wonder how it works, or even if deleting apps is still possible.
Read on to learn how to delete apps in iOS 13 and later on iPhone, iPad, or iPod touch.
How to Delete Apps from iOS 13 & iPadOS 13
Here is how you delete apps in iOS 13 and later on the iPhone or iPod touch, and iPadOS 13 or later on iPad :
From the Home Screen, navigate to the app you want to delete
Tap and hold on the app icon that you want to delete, continue holding until a pop-up menu appears
Continue holding the tap until the pop-up menu vanishes and all the app icons start to wiggle, do not let go of the tap until the icons wiggle
Tap the “(X)” button on the app you want to delete
Tap to confirm that you want to delete the app in question
When finished deleting apps, tap the “Done” button in the corner, or use the Home gesture to stop the apps jiggling
That’s all there is to it, slightly different from before, but not too different.
The main thing to keep in mind with deleting apps from iOS 13 is that you have to keep holding the tap until the icons start jiggling, which is just as it was before except now there’s a little contextual pop-up menu that shows up first. This can be a little confusing at first, but with practice you’ll quickly get the hang of it. Just keep holding on that app icon tap and ignore the contextual popup menu (or choose “Rearrange apps” from that menu), then in a moment the icons will wiggle and you can delete the app as usual.
You can also delete apps by choosing “Rearrange apps” from the pop-up menu that shows up, and likewise you can rearrange apps in iOS 13.x and iPadOS 13.x using the same method by tapping and holding on an app icon until they jiggle and then move the apps around as usual.
The very short video embedded below demonstrates how to delete apps on iOS 13 and later on iPhone, the entire process of deleting an app from start to finish is seconds long as you can see in the video itself :
You can also delete apps directly from within the App Store too now, through the Updates section, allowing you to easily uninstall apps from the same place you installed them from originally. Speaking of the App Store